Piercing Pattern: How to Set Your Stop-loss
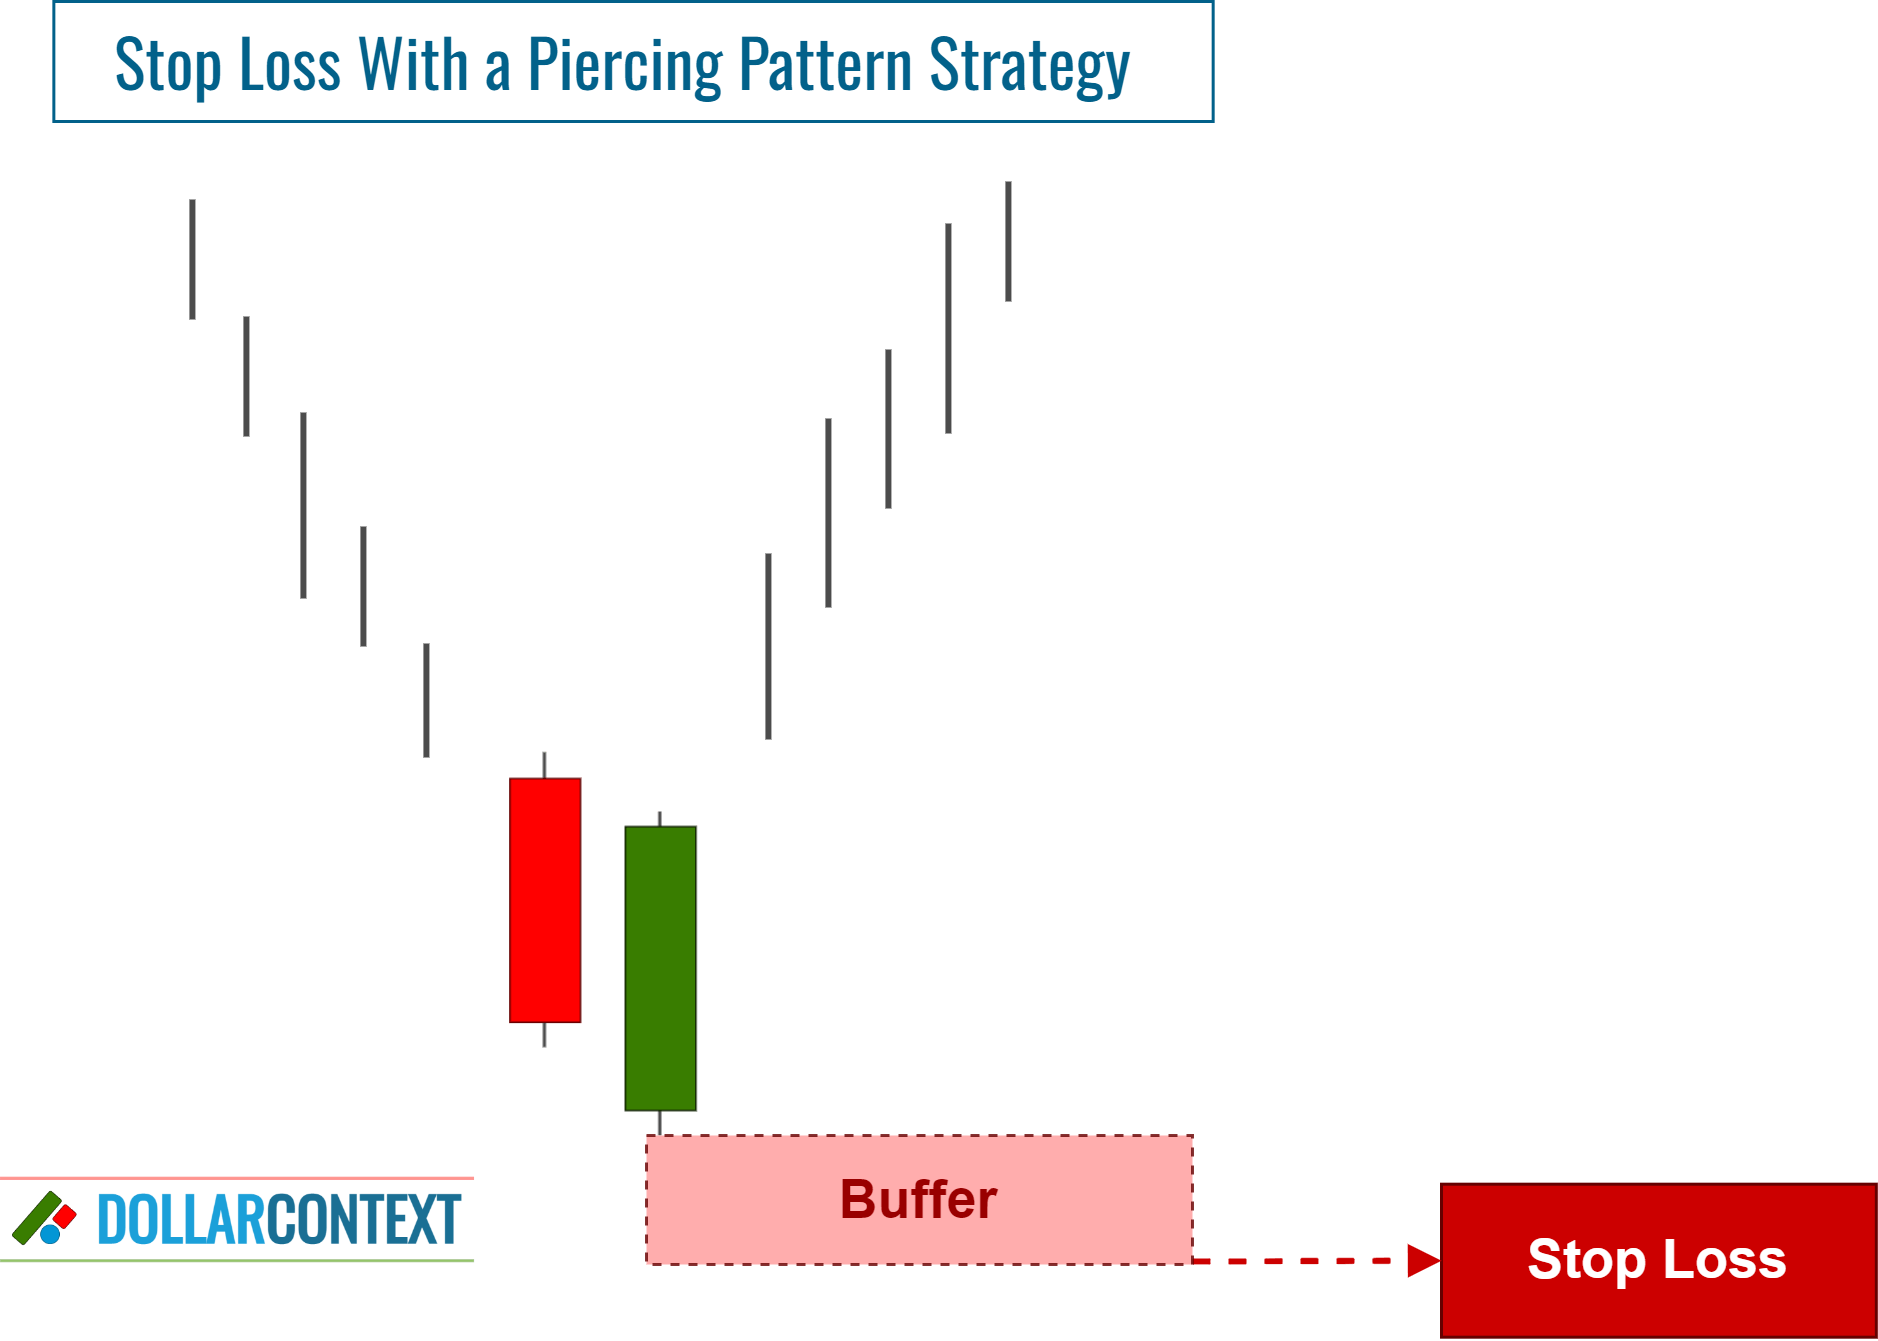
Set the stop-loss level below the low of the piercing pattern to protect you against potential downside risk.

Establishing a stop-loss point is vital in trading, particularly when integrating a piercing pattern strategy. A piercing pattern is a two-candle combination that suggests a possible trend reversal after a downtrend.
In this article, we'll discuss how you can efficiently set a stop-loss when using the piercing pattern to open a position in the market.
1. Correct Identification
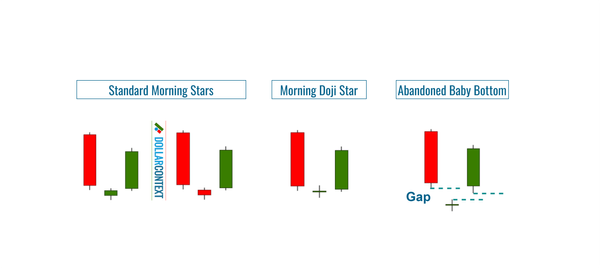
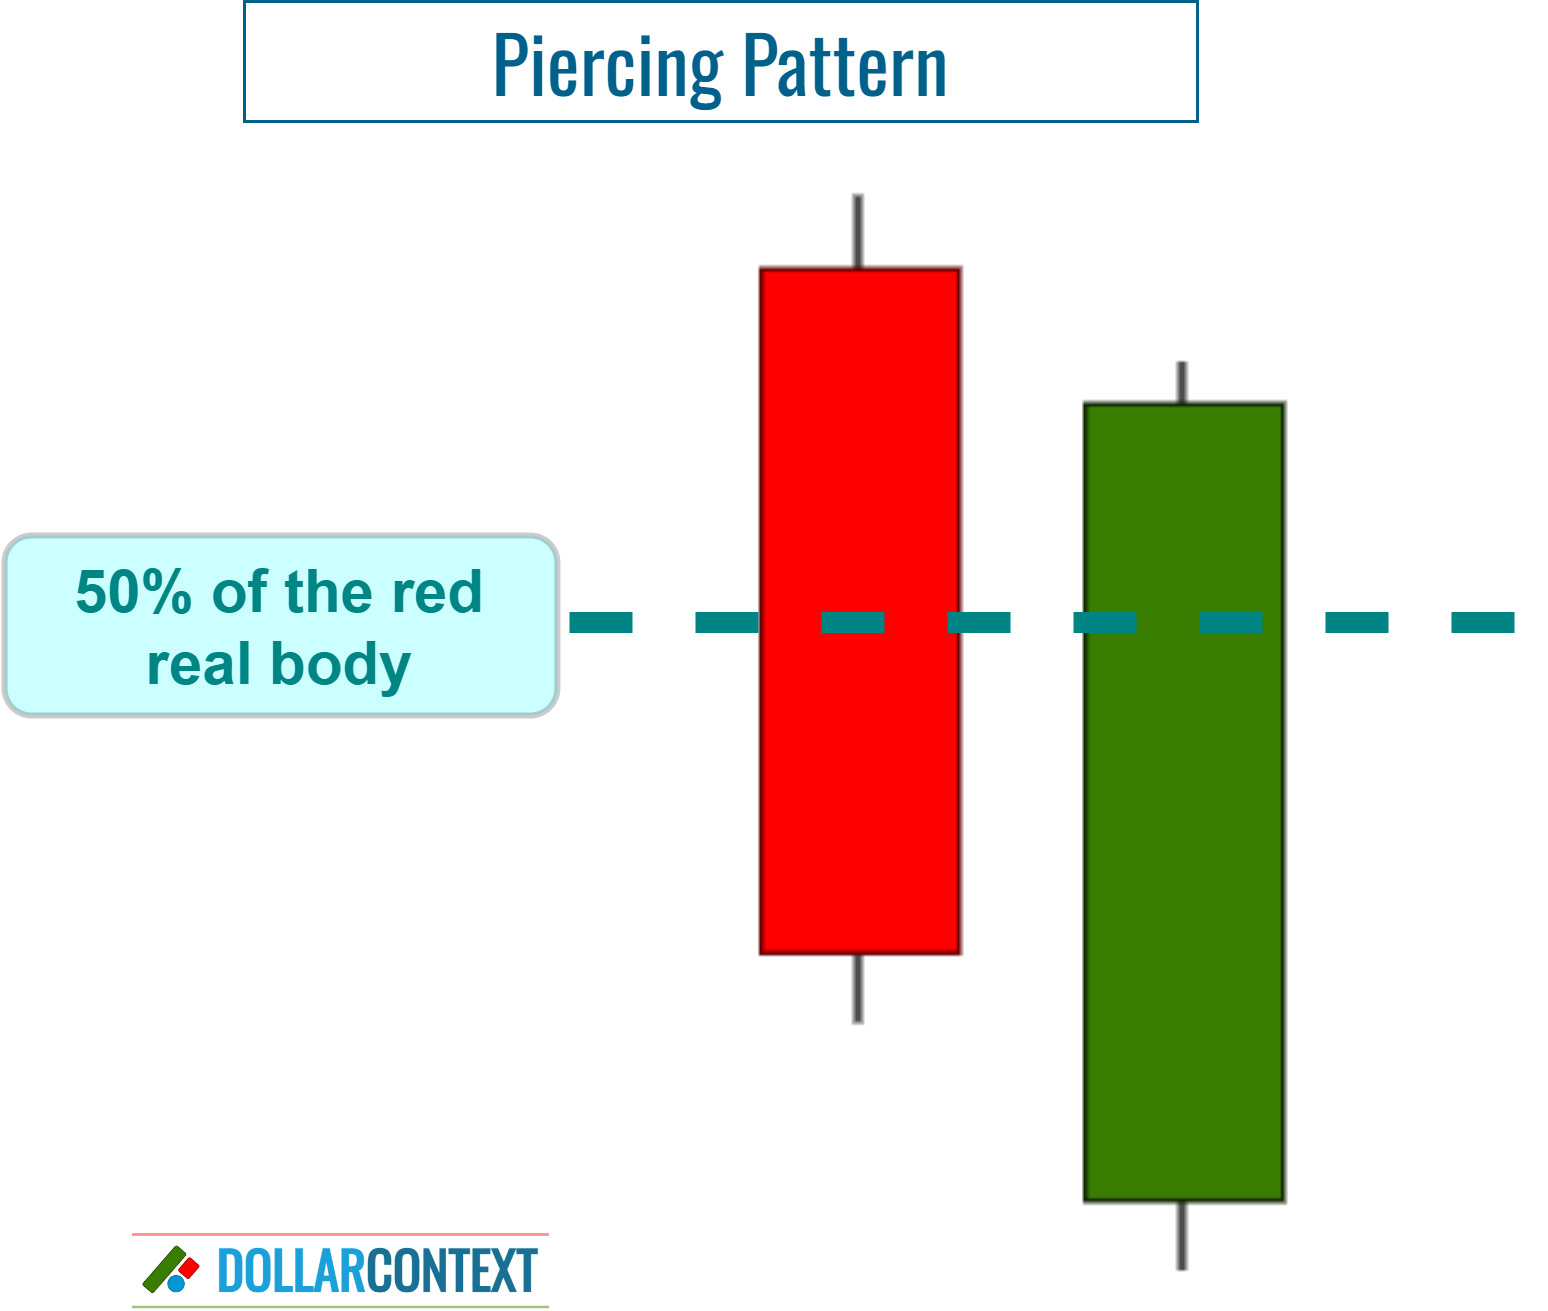
Ensure that you accurately identify the shape of the piercing pattern on your chart. This pattern consists of two candles and is distinguished by:
- a bearish session where the close is significantly lower than the open
- a bullish body that opens below the low of the first candle, ideally with a gap down, and closes within the body of the first candle but above its halfway point.
2. Verify the Preceding Trajectory
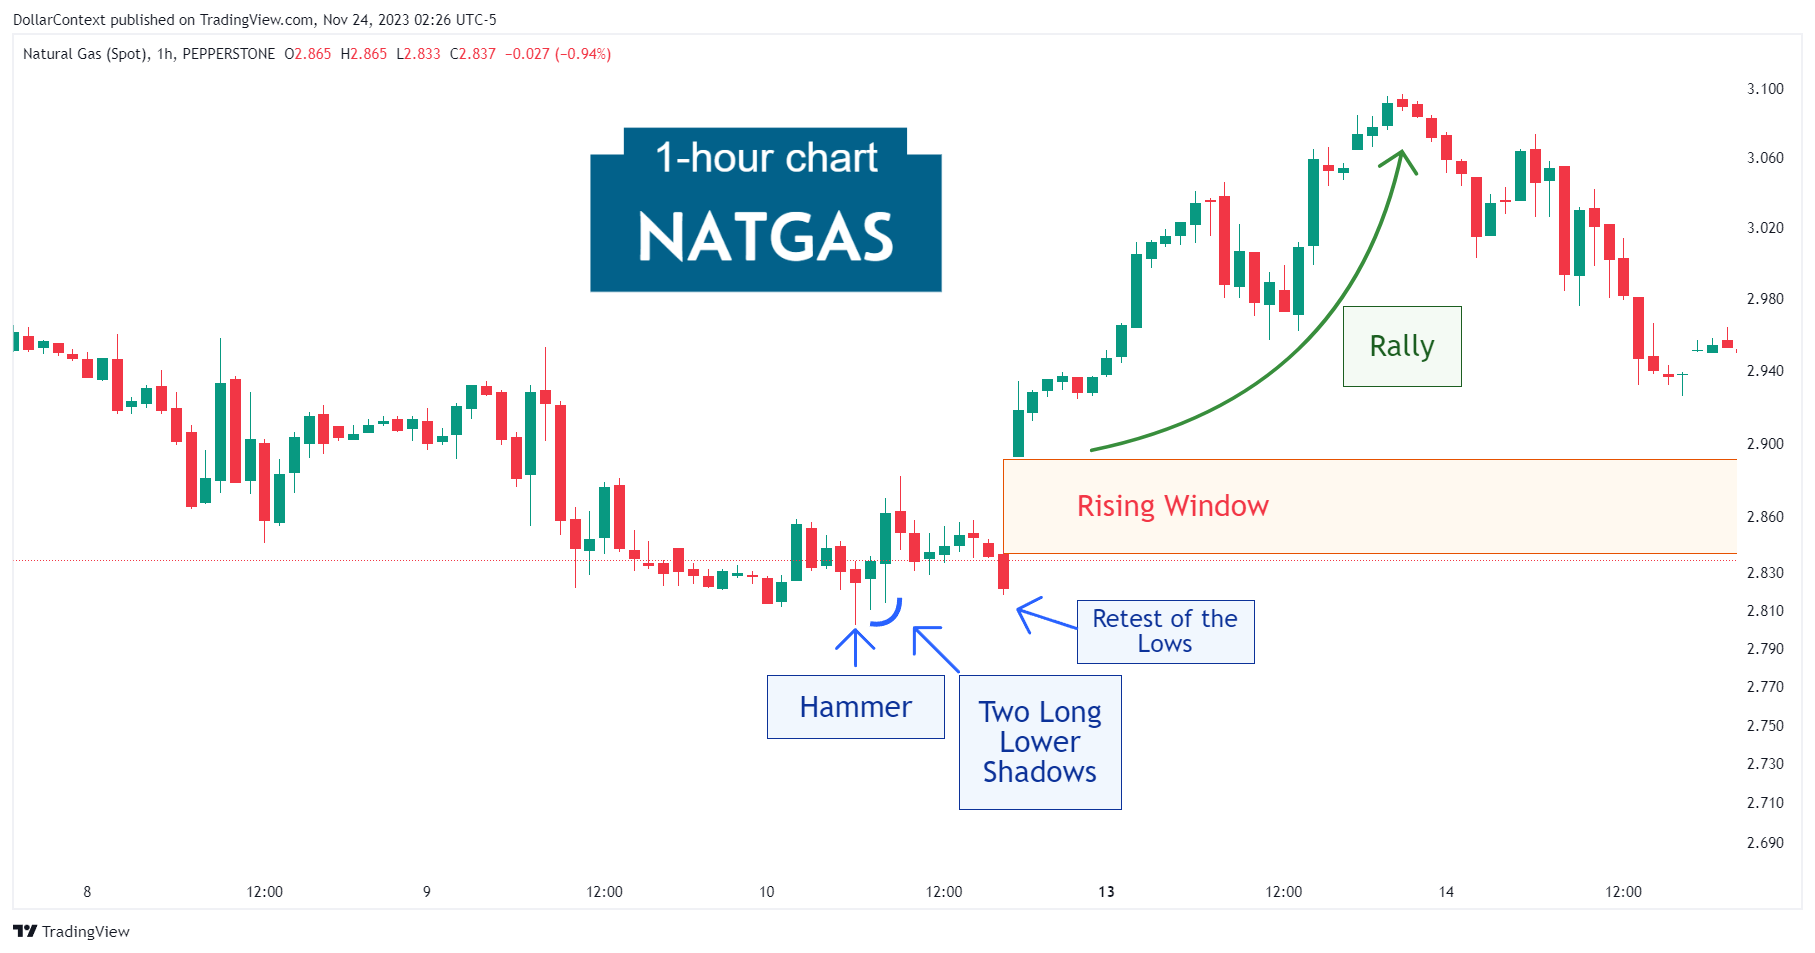
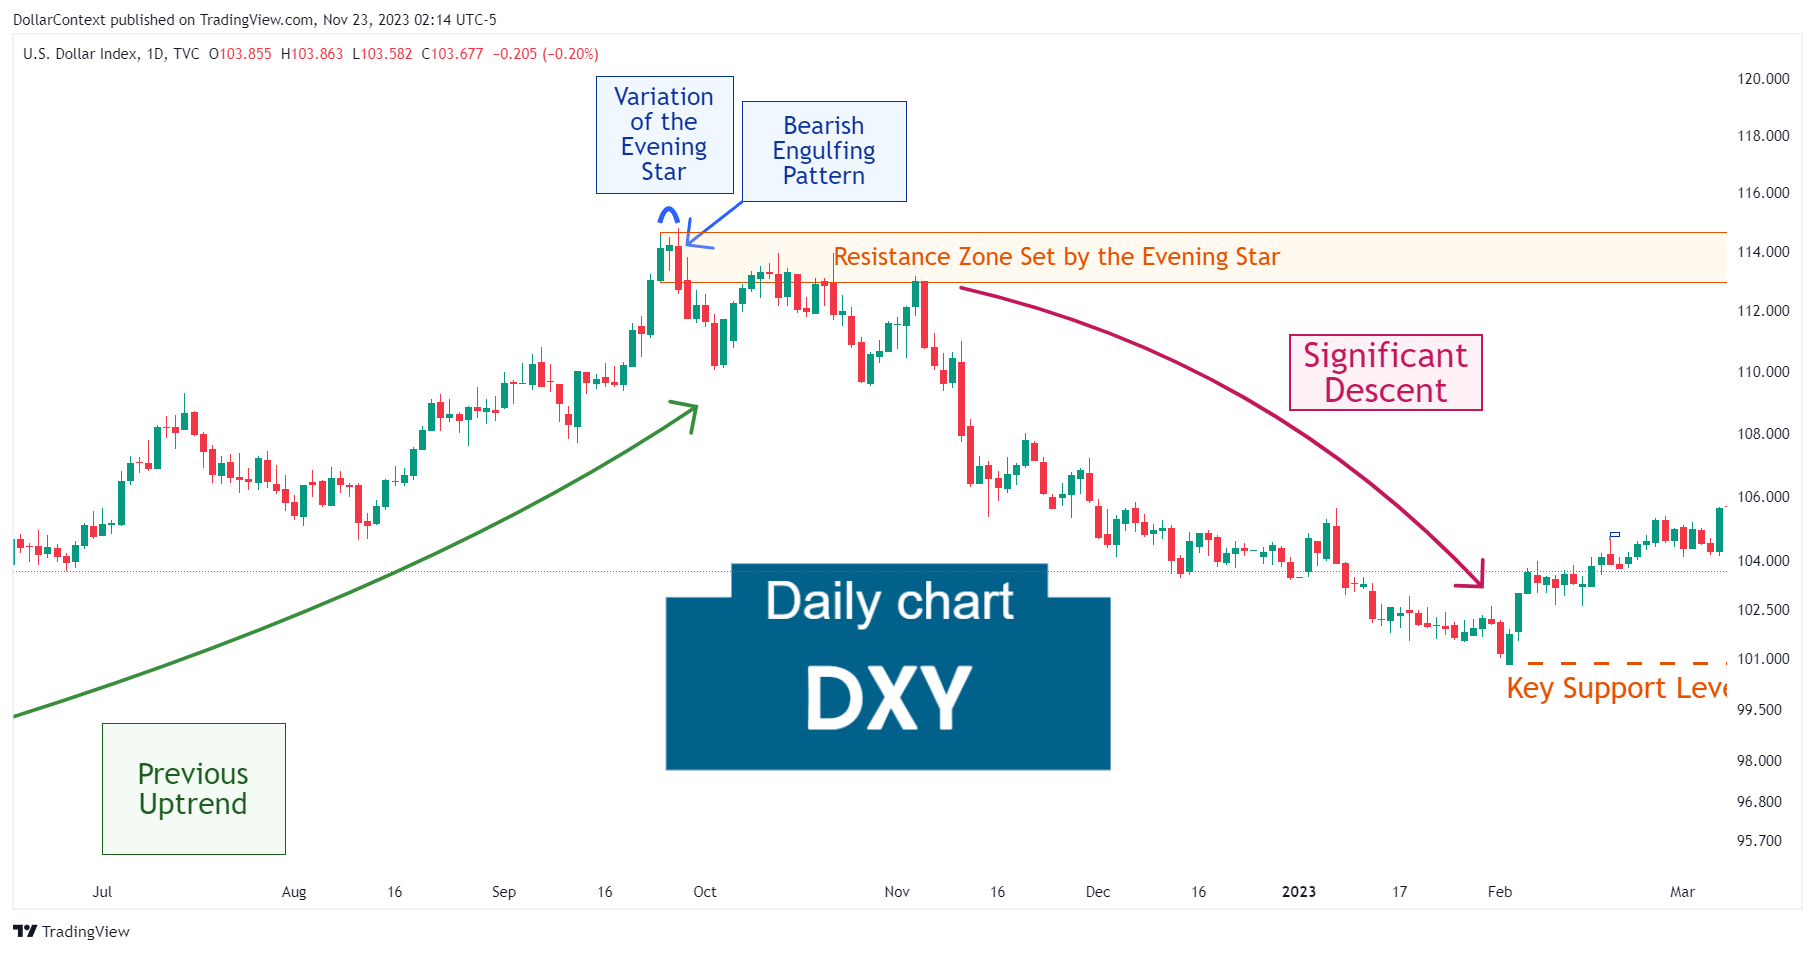
Psychologically, a piercing pattern conveys a change in market sentiment from bearish to bullish. Therefore, for it to serve as a reversal indicator, it should be preceded by a downward trend.
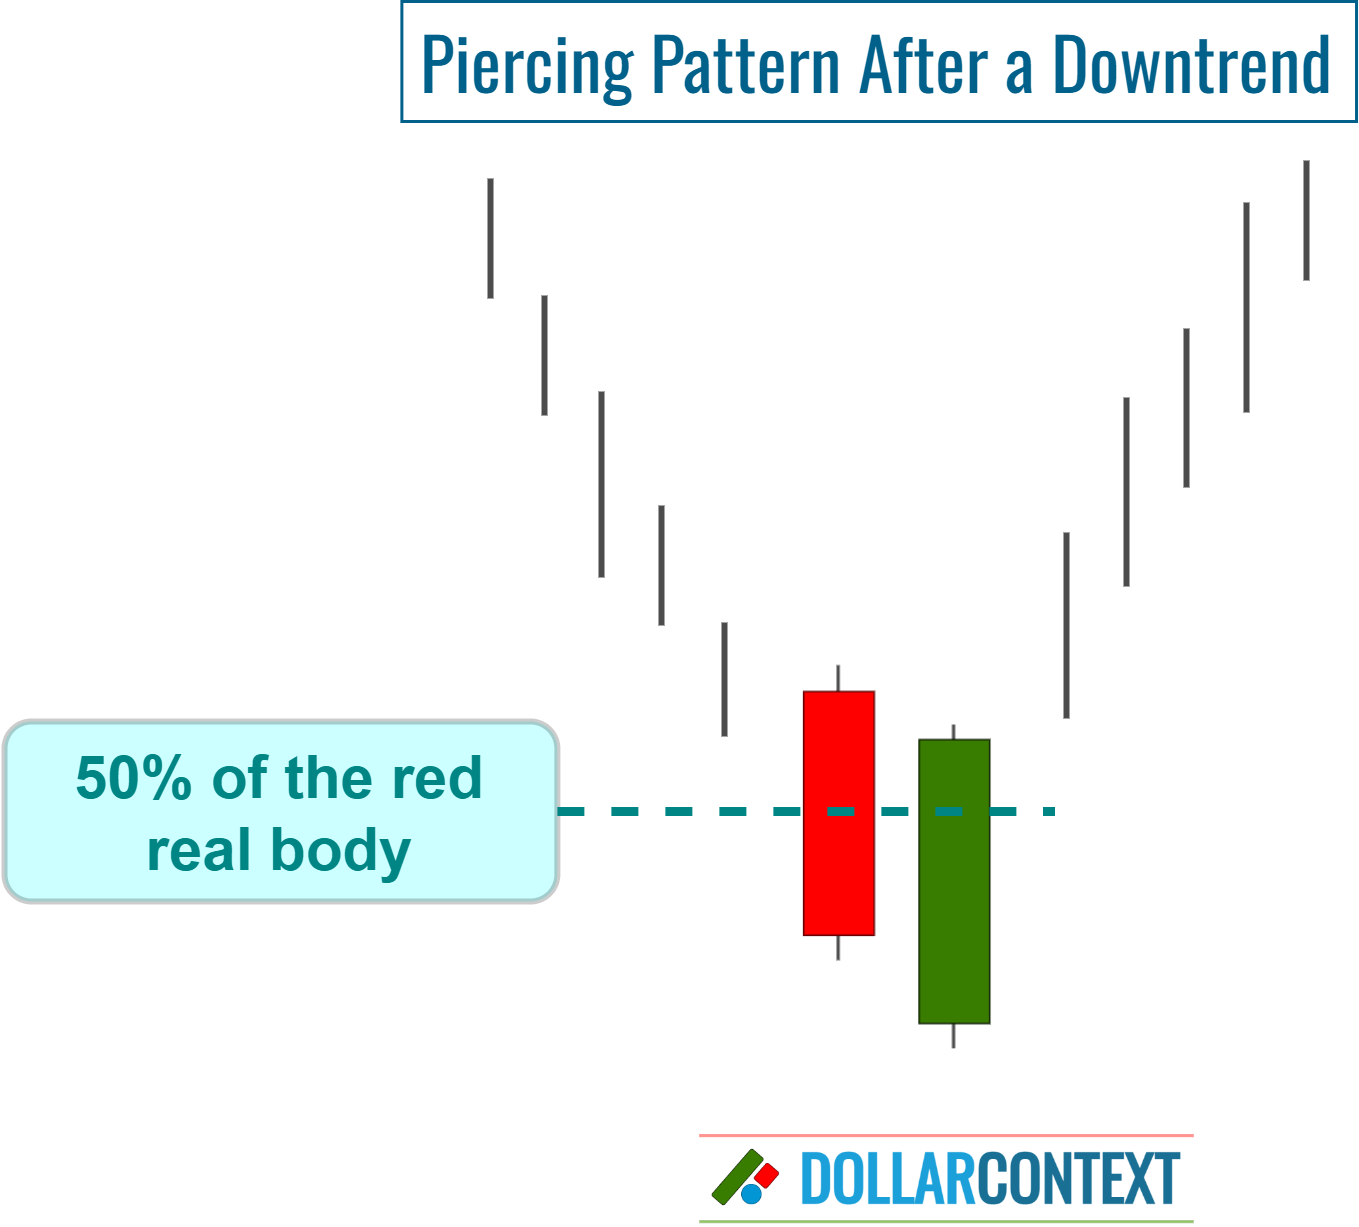
When the market is either trapped in a tight range or displaying an uptrend, a piercing pattern typically holds little relevance.
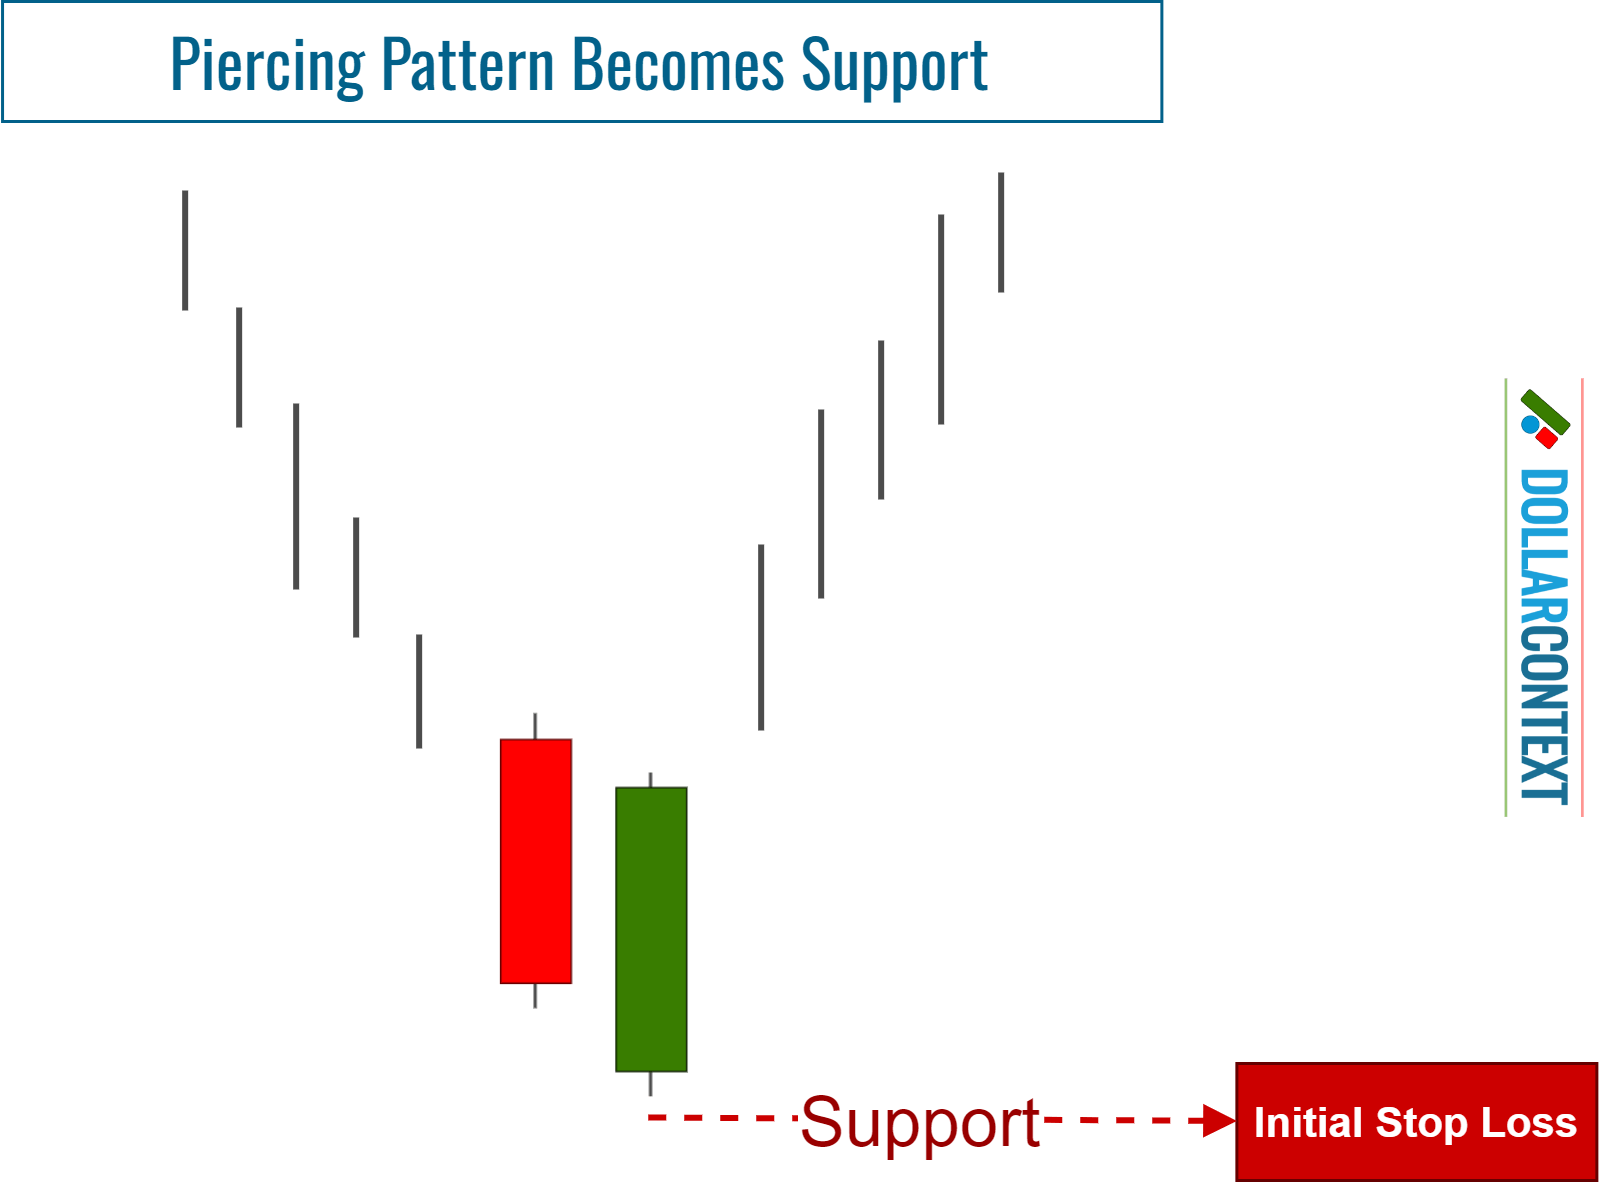
3. Identify the Support Zone
The price range of a piercing pattern acts as support. Notably, the session's low serves as a support level, which can be used as your primary stop-loss point.
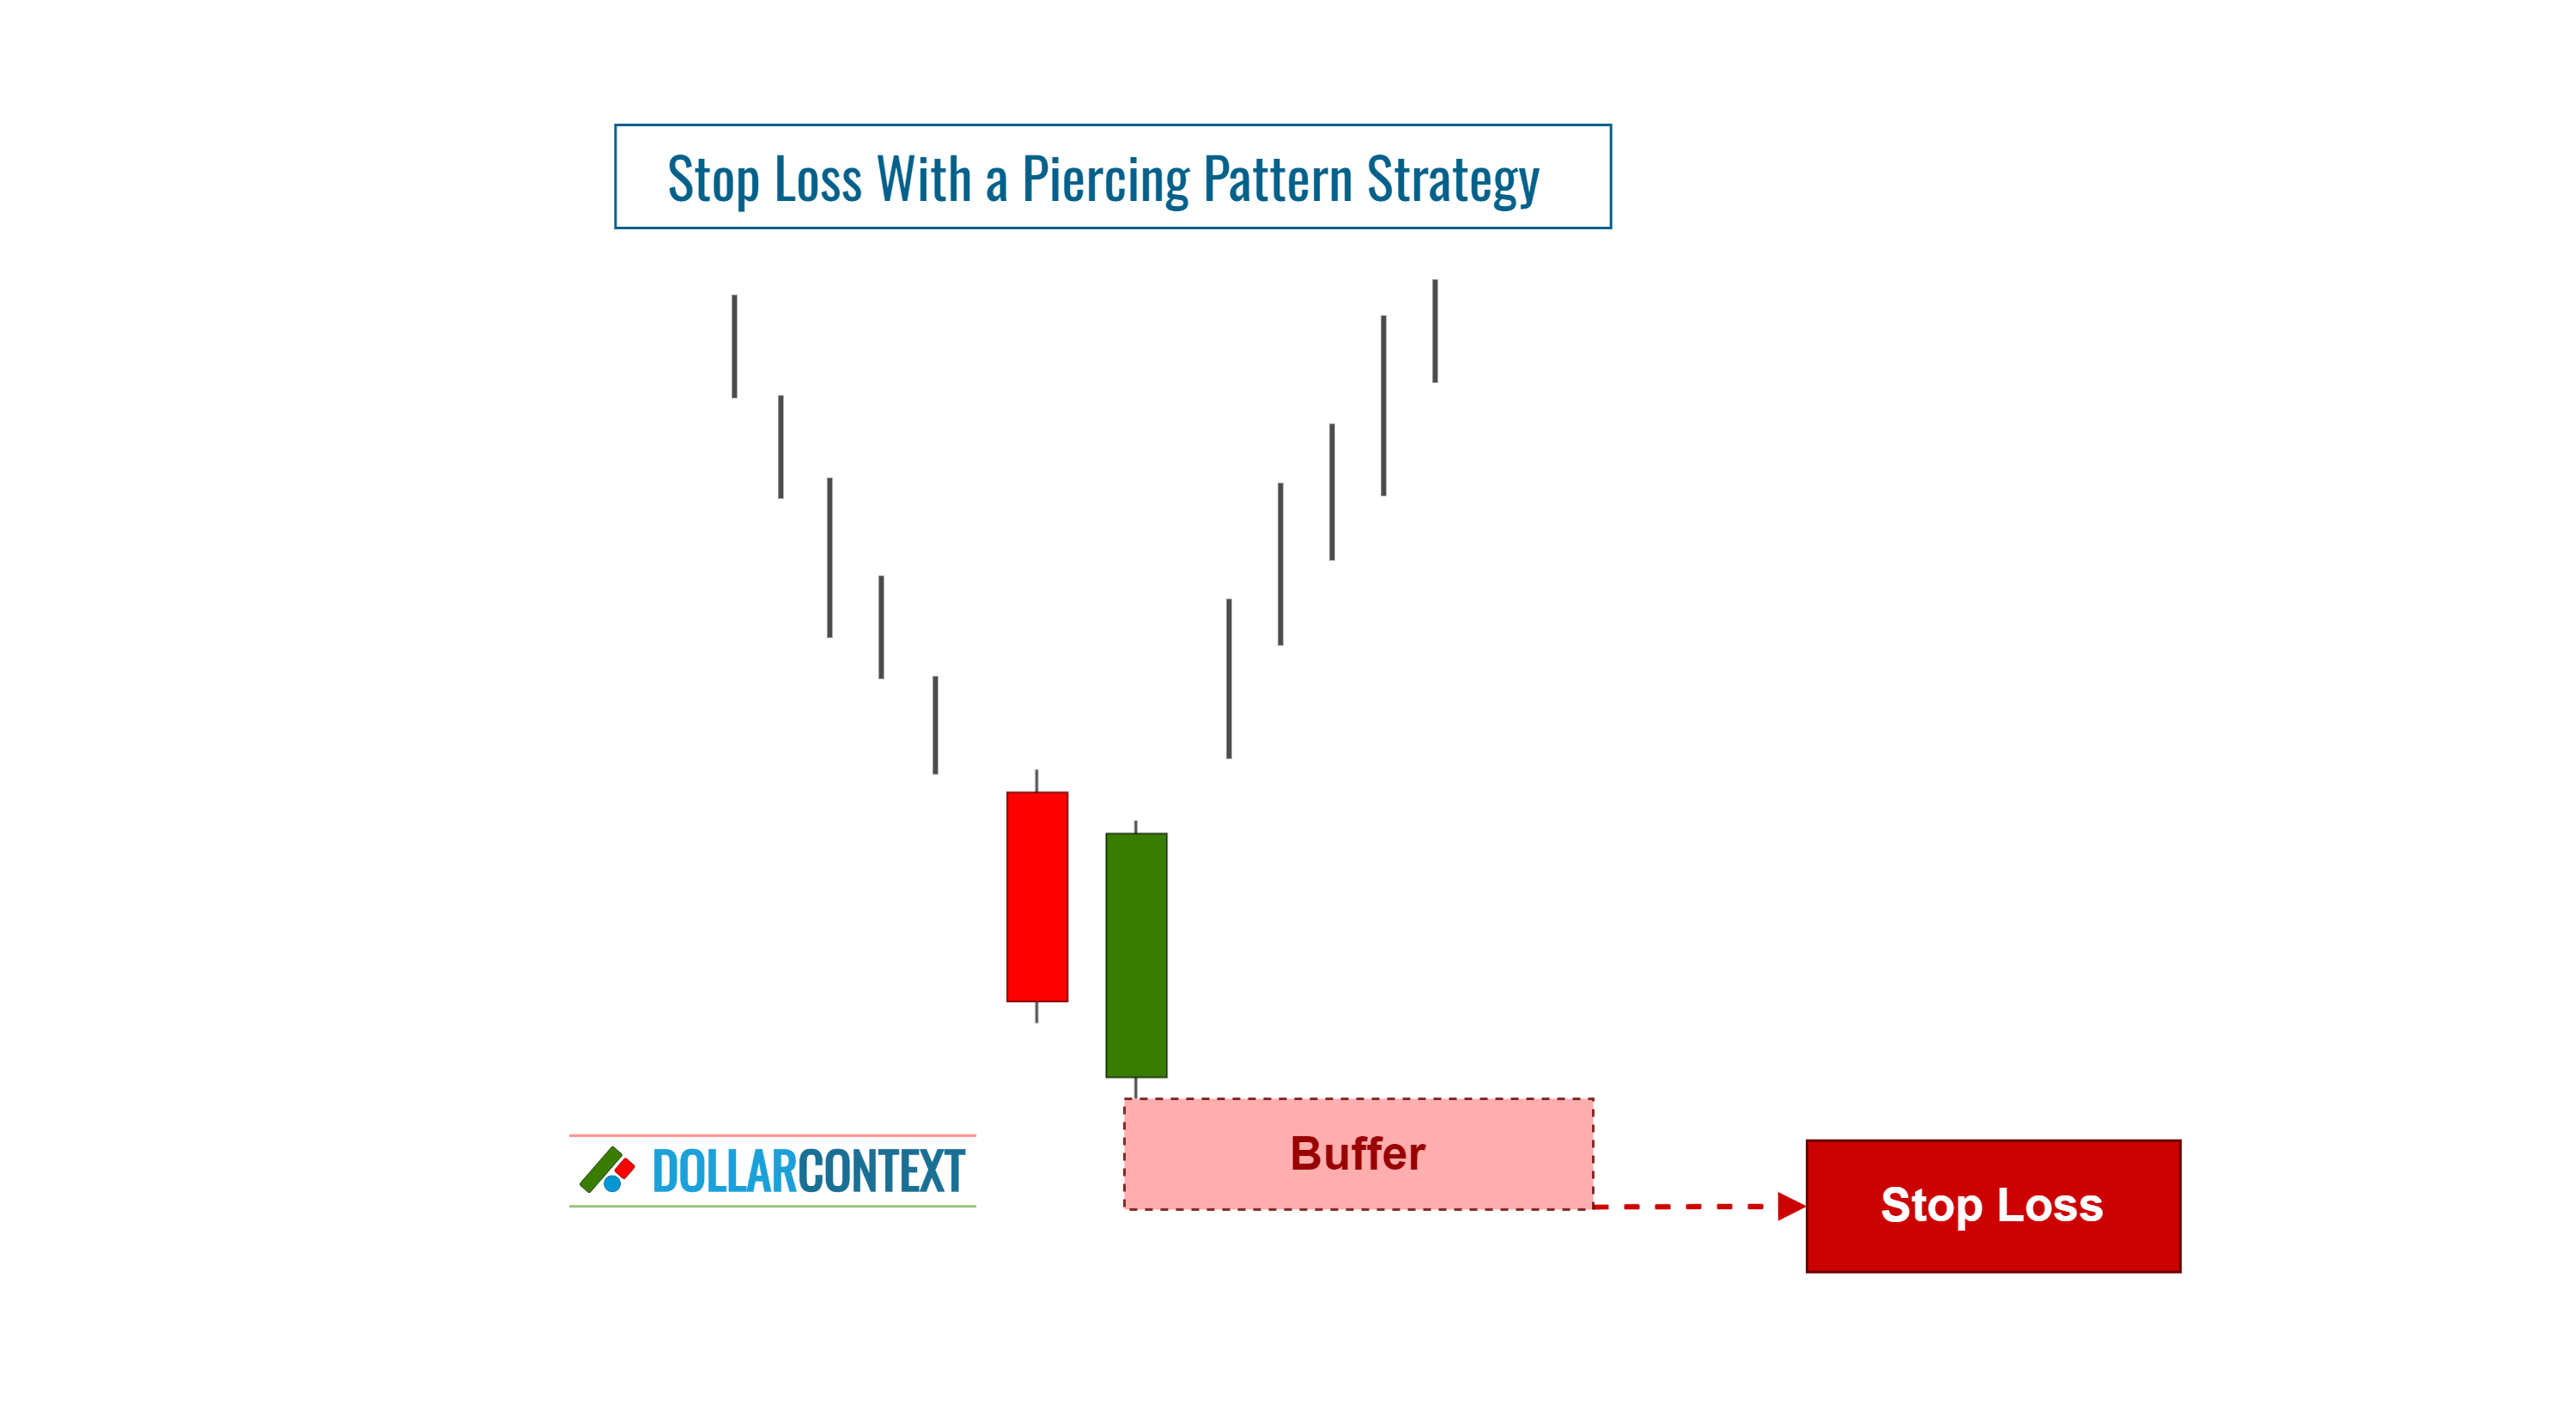
4. Consider Adding a Safety Margin
After considering factors like risk management, volatility, and other market conditions, it might be wise to add a cushion to your initial stop-loss. This added safety measure can proficiently guard you against the repercussions of false breakouts following the emergence of a piercing pattern.
5. Decide Whether Your Stop-loss Is Based on a Close
A stop triggered upon closing occurs when the end-of-session price surpasses the stop-loss threshold, rather than solely relying on price fluctuations within the session.
When working with candlestick charts, it's commonly advised to establish a stop-loss at the closing point, particularly when leveraging a piercing pattern to open your position.
6. Monitor the Trade
Consistently monitor the market and your position to confirm they align with your piercing pattern strategy:
- Modify your stop-loss point as necessary. Markets are dynamic, and as your trade progresses, new candlestick formations might emerge. When this happens, think about recalibrating your stop-loss to match the shifting circumstances. For example, if another candlestick pattern surfaces at a level similar to the piercing pattern, it's prudent to reposition your stop at the lowest mark of both patterns.
- When the price movement is favorable, consider using a trailing stop-loss to protect gains and adeptly handle risk.
- Stay disciplined. Avoid decisions fueled by emotions, irrespective of market fluctuations.